
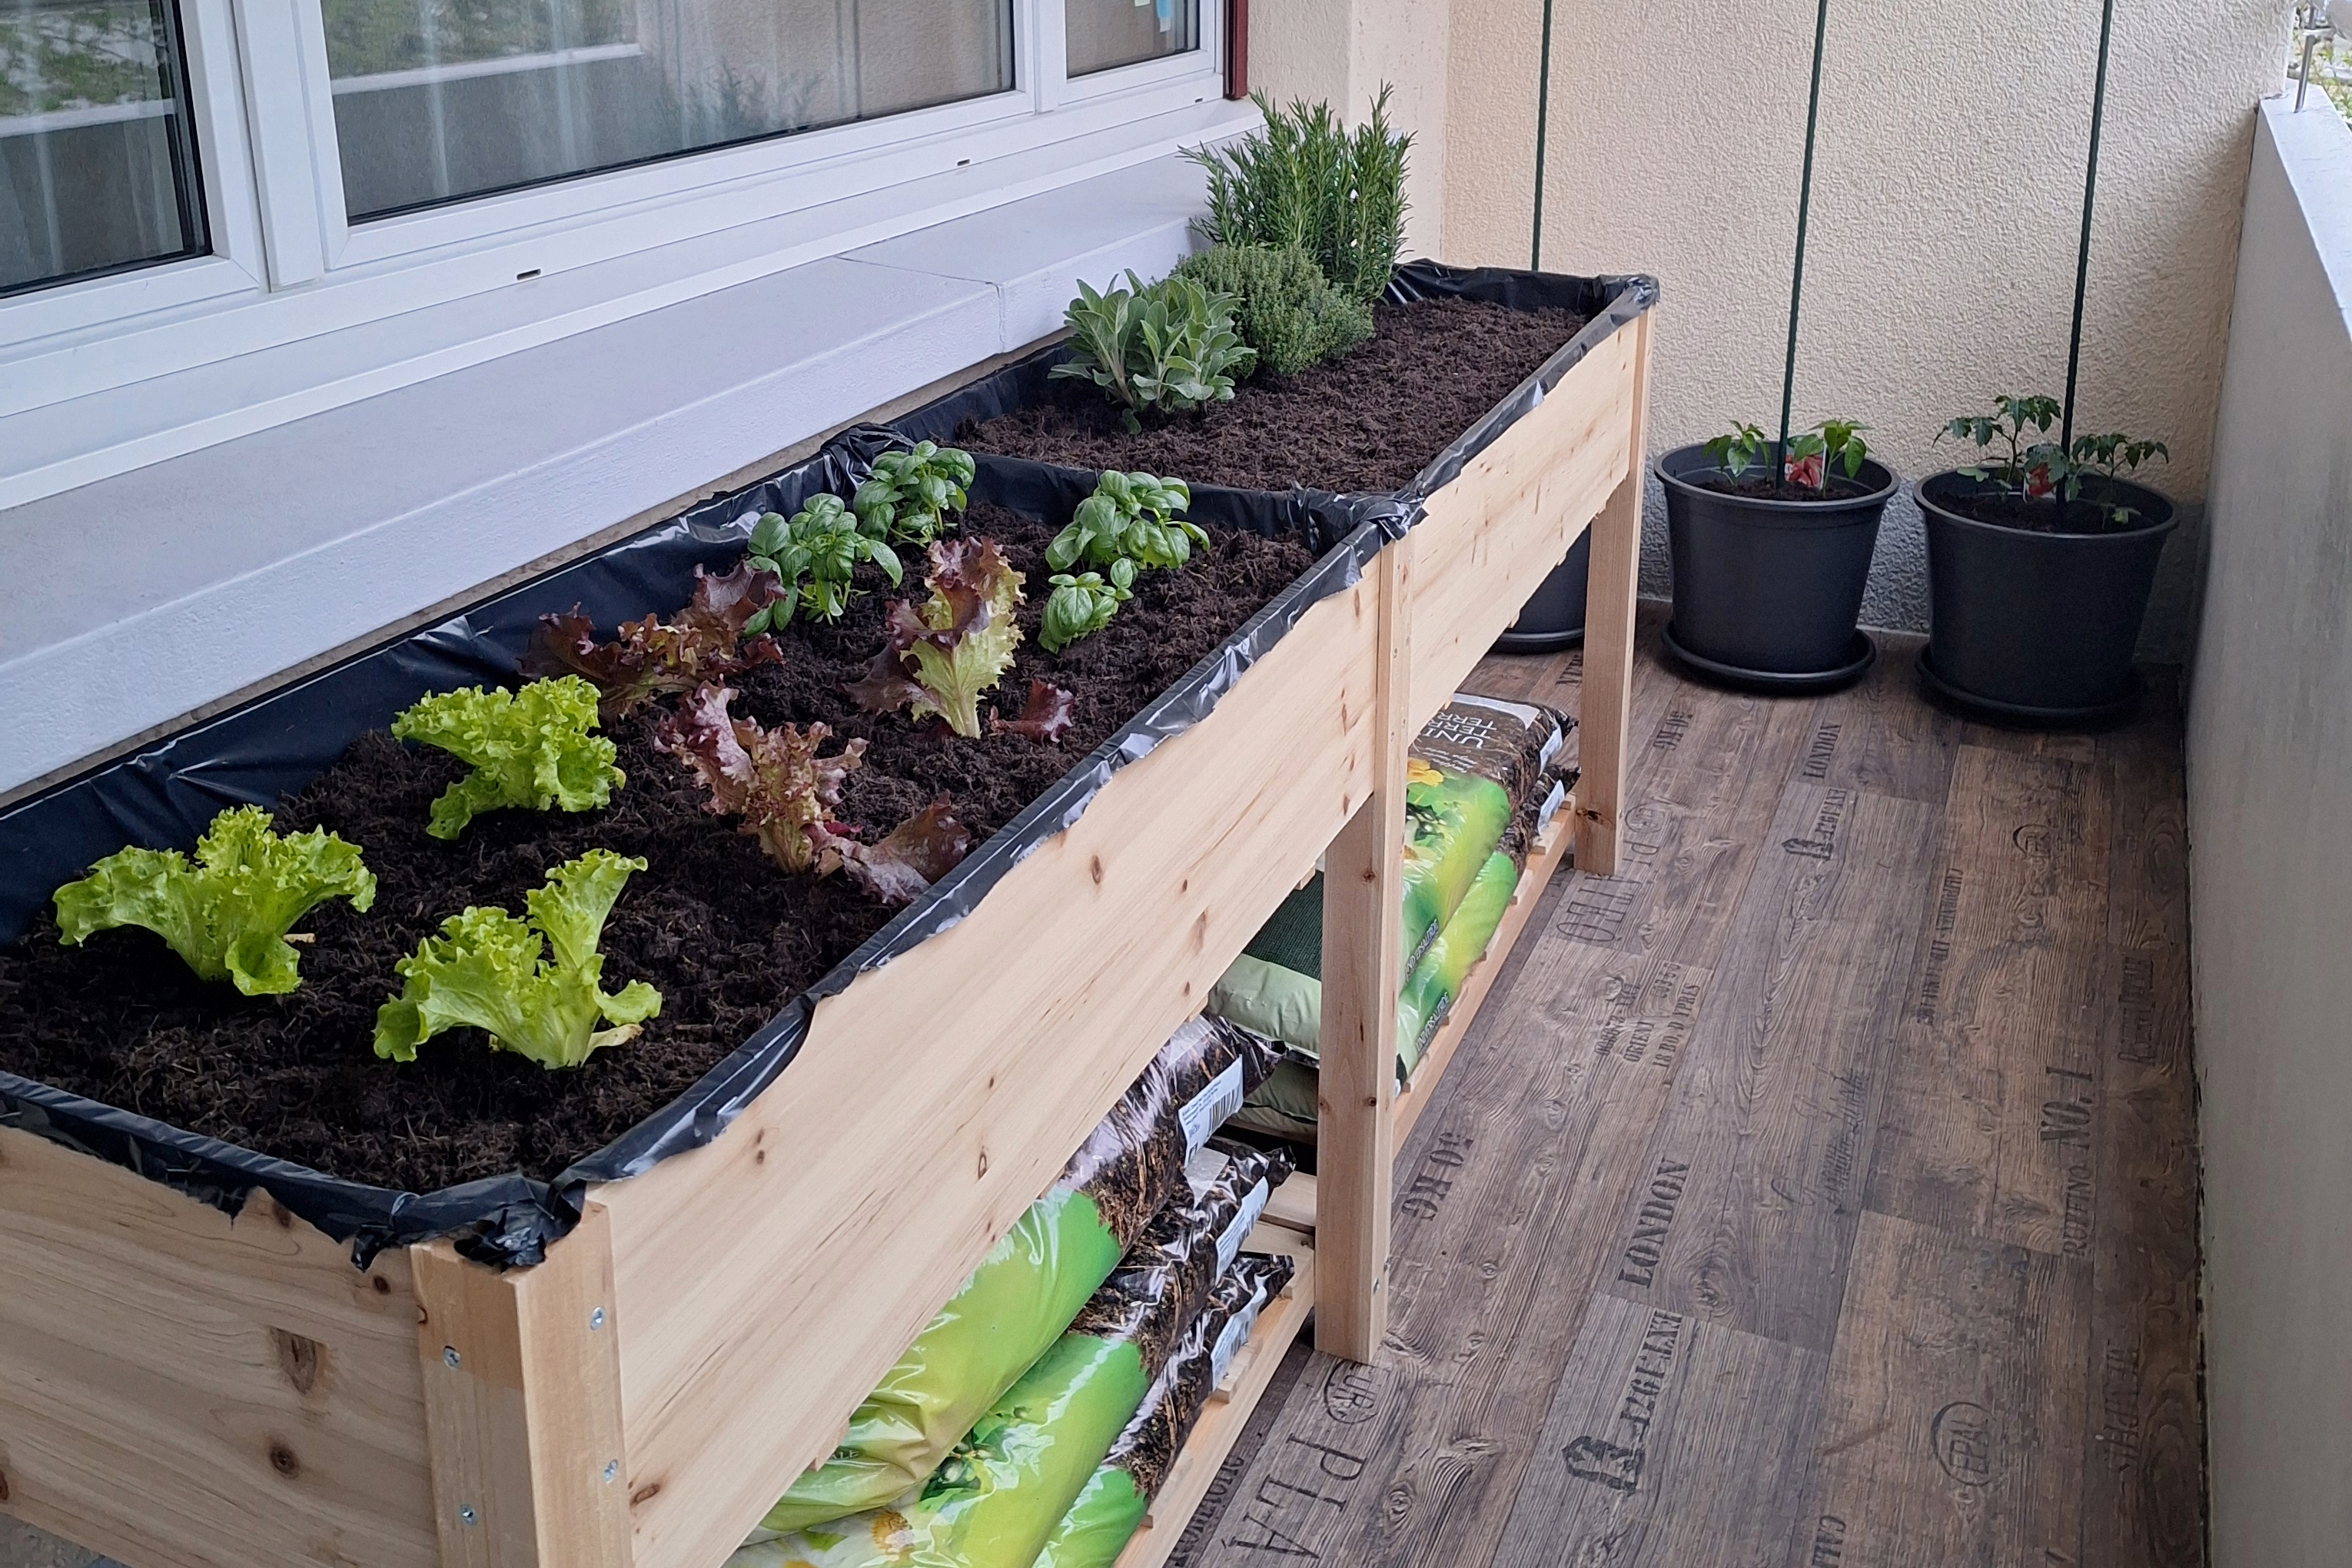
What if you could grow your own vegetables… even without a garden? Find out how I created my raised bed garden and how you can make one too.
What is a raised garden bed
Raised bed gardens are a method of growing plants in soil that is lifted above ground level, forming defined planting areas that are easy to reach without stepping on them.
Unlike traditional row gardening (originally designed for large-scale farming with animals or machinery) raised beds make better use of space and improve soil conditions.
They can be simple mounds of soil or more structured frames made from materials like wood or stone, built to hold the soil in place and withstand weather conditions. (Source: Mitchell, 2015, p.1)


Benefits
- Better use of space: raised beds give you more space to grow plants and less space is wasted on paths. Also you can plant more plants for space instead of the traditional rows.
- Better soil: compost and fertilizer are added only where plants grow, not on paths. The soil stays loose, drains well, and doesn’t need frequent digging.
- Save water: plants grow close together, so they shade the soil, reduce water loss, and keep roots cooler. Water is used only where it’s needed.
- Fewer weeds: plants are closer, so weeds have less space to grow.
- Longer growing season: soil in raised beds warms up faster, so you can start earlier. Rain causes fewer problems since there’s less mud.
- Better pest control: it’s easier to protect plants with covers, and you can rotate crops between beds to reduce pests.
(Source: Mitchell, 2015, p.1, p.4)
My small-space garden dream
I was lucky to grow up in a house with a garden and a vegetable patch. Ever since I was a child, I would look forward to spring with excitement because it meant it was time to start the garden. From digging the soil to choosing the seedlings and deciding where to plant them. I loved every step. I’ve always enjoyed getting my hands dirty, and above all, feeling the earth beneath my bare feet.
Since October, I’ve been living in this new apartment in the center of Switzerland, and one of my biggest wishes was to have a small vegetable garden here too. Without a garden, growing vegetables is more challenging, but not impossible!
A few months ago, I started planning my raised garden bed: researching materials, choosing the right plants… Below you can see the result.
Before

Now

Step 1: start with a plan
The first step is to have an idea. Mine was to create a long piece of furniture that would still allow for comfortable movement.
On a sheet of paper, I sketched out the idea, including the measurements. A small tip: draw to scale so you can truly understand how much space a piece of furniture will take up.
Step 2: finding the right furniture
Before finding the right piece of furniture, I had to search through various websites. The one you see in the video is from vidaXL. I really like it because it matches exactly the dimensions I was looking for, but the shipping wasn’t very well tracked, and it took me forever to assemble it. If I had a franc for every screw I put in, I’d have a house with a garden by now.
If you don’t have time to build something, I recommend going for ready-made crates or furniture that snaps together easily.
Step 3: how much soil do you actually need?
Since I don’t have a car, I had to order the soil. In this case, I placed an order with Jumbo. The delivery cost me CHF 70, but it arrived quickly with a large truck.
To calculate how much soil you need, you can use the following formula:
In my case, here’s the calculation I made: (201cm x 48cm x 20cm) : 1000 = ~193 liters of soil.


Since I also wanted to add some pots, and I had to pay for shipping anyway, I figured, why not go all in? So I bought 10 bags of 40L each… and now I have 4.5 bags left over.
But hey, I’ve got plenty of new projects in mind… 🌱
As you can see in the picture, I went for universal soil (CHF 6.95 for 40L). I did consider getting a special mix made specifically for raised garden beds… but let’s be honest, I’m a student, not a botanical billionaire. 😄
Step 4: choosing the right plants
It has already happened to me that I bought plants from a grocery store and found insects in the soil. If you have other plants nearby on your balcony, having pests in one pot can quickly spread to all the others. And when you’re growing edible plants, it’s better to avoid certain types of pesticides…
For these reasons, I decided to look for a local farmer or nursery instead (of course, it doesn’t mean there’s zero risk of insects), but it’s definitely a more organic and sustainable choice.
While browsing the map, I found Luzern Garten AG, a true paradise for plant lovers. You can find everything there: aromatic herbs, fruit trees, vegetable plants, indoor plants, and all the essentials to create your perfect green space (pots, lights, soil, and more).
Since it was a beautiful day, I turned it into a special kind of date with my boyfriend… (and got myself an extra pair of hands to carry all the plants 😄).
Here’s what we got:
- Aromatic herbs: sage, thyme, rosemary, mint, basil 🌿
- Vegetable plants: 6 lettuces, 2 tomatoes, 2 cucumbers, 2 peppers, 1 chili pepper 🌱
For our next trip, we’re planning to get: parsley, chives, onions, garlic, and a few more plants… the garden is just getting started 😄
Step 5: setting everything up
Since a raised garden bed requires watering, it’s important to properly protect the furniture from moisture and mold, especially if it’s made of wood. To do this, you can simply use a plastic liner and secure it in place (see video).
Important: don’t forget to make a few holes to allow any excess water to drain! 💧
The best part: bringing your garden to life
Placing the plants into the soil is the moment you realize your project has truly come to life. You can finally start growing your own vegetables at home. For me, my little plants are like pets to care for and love, something to be proud of, something that brings you joy (just without the fur… 😄).
Before planting, we had to fill everything with soil and break it up because it was very compact. By the end, we couldn’t even feel our hands anymore (after dividing about 200L of soil!). For the tomatoes, cucumbers, and peppers, I had also bought some fairly deep pots from Jumbo. The original idea was to get just one plant per type for better quality… but I couldn’t resist. Now we’ll see if they have enough space, otherwise, I guess I’ll have to get more pots.
After filling the pots and the raised bed with soil, we started looking for the perfect spot for each plant. At this stage, I usually don’t take them out of their plastic pots yet, I first decide on the ideal position.
Once you’ve found the right spot, it’s time to remove them from their pots and plant them. Make sure to leave enough space between each plant (you can easily find the recommended spacing by searching the plant name online). Also, pay attention: some plants (like basil) actually contain multiple seedlings in the same pot. For better growth, I recommend separating them and planting them individually.
This Is Just the Beginning… My project is still ongoing, stay tuned to see how it goes! 🌱
Steps to create your own raised garden bed
- Choose the right spot: pick a place that gets plenty of sunlight (ideally 6-8 hours a day) and is easy to access for watering and care.
- Decide the size: keep it small and manageable, wide enough to reach the center without stepping inside.
- Select your materials: use wood, metal, or any sturdy container you have available. It doesn’t need to be perfect, simple works best.
- Build or place the frame: assemble your raised bed or position your container. Make sure it’s stable and level.
- Fill with quality soil: use a mix of potting soil and compost to create a nutrient-rich, well-draining environment for your plants.
- Choose beginner-friendly plants: start with easy options like herbs, lettuce, or cherry tomatoes to build confidence.
- Water regularly: keep the soil evenly moist, raised beds can dry out faster than ground soil.
- Enjoy and personalize your space: add small decorative touches and make it a relaxing, enjoyable corner of your home.
(Source: Mitchell, 2015, p.3-4)
If you want to have more plants outside but you have no space discover vertical gardens: Vertical garden: smart, beautiful space-saving
Bibliography:
- Mitchell, S. (2015). Raised Bed Gardening. Oklahoma State University Cooperative Extension Service. (HLA-6033). https://openresearch.okstate.edu/server/api/core/bitstreams/49ccedc4-1eb4-4b89-81fd-2dffb3e883c8/content


Leave a Reply